News
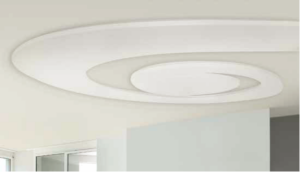
M-System Technology for artistic ceilings
ATLAS M-System is a new innovative technology which allows us to install different types of boards in the most demanding areas. In this article we are going to present a creative M-System installation example – a ceiling with artistic shapes.
Artistic ceilings are usually time-consuming complex solutions which require painstaking work from every contractor, especially when one uses traditional technology. The first stage consists of measurements, then the perimeter profiles and hangers are assembled. Next the assembled elements must be connected with screws. Finally, the horizontal plasterboards and side flexible plasterboards are fixed in order to “case” the ceiling.
Those, who have carried out a so-called casing, know that this work requires never-ending matching and cutting of the profiles. If one works just by himself, it means he needs to go up and down the ladder multiple times to measure, cut to size and screw the profiles.
M-System installation
Artistic ceiling assembly is much easier when using M-System. One just needs to do the following:
- draw the shape of the designed ceiling,
- determine the fixing points for anchors,
- drill the holes (here is some interesting fact – the amount of holes in the substrate in the
M-System technology is only about 20% larger than in the traditional approach), - insert the expansion sleeves into the holes,
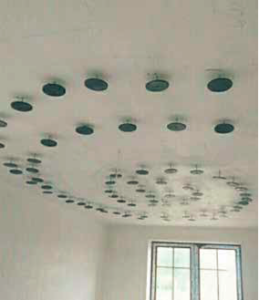
- set the cross laser to determine the curtain parallel to the existing ceiling (Figure 1)
- mark a line on the drill-driver; screw the anchors until the laser line aligns with the marking (Figure 2). Arrangement of installed anchors is shown in the Photo 2,
- form the sides of the ceiling with the scored Atlas Building Board.
Ceiling sides assembly with the use of M-System Technology is much easier in comparison to traditional scored profiles and flexible plasterboards. Usually it is difficult to install the sides of the ceiling when it is much lower than the substrate. However, in our case we just need to install the 2 cm thick scored Atlas Building Board and form the side at our will.
The technology of installation of Atlas Building Board on the side of the lowered ceiling is not complicated. One can commence the assembly when the anchors and horizontal plasterboards are already installed. Atlas Building Boards must be cut and the edges must be coated with a single-component adhesive. Then the element can be bent to form a given shape and placed between the substrate and lowered ceiling. In addition to the adhesive, one should use the screws at least 50 mm long and screw them through the plasterboard so they join the plasterboard with the Building Board. The described assembly is very easy and quick. It also makes it much easier to form ceilings complicated in shape.
Construction of the supporting structure and casing is much easier in comparison to the traditional technology. They can be easily fitted in the newly constructed buildings. We use the original ceiling as the substrate which we mount the second lowered plane connected with specially developed and patented anchors to. The distance between the original ceiling and the lowered one starts already from 1 cm using the provided M-System technology.
The most important advantage is that the assembly can be carried out by a single contractor. This results from much less
workload. In addition, it is not a problem to install LED or traditional lighting installations.
The finishing works related with lowered artistic ceiling have been also thoroughly planned by Atlas. The perfect solution for jointing is ATLAS Gips Stoner. Despite that in traditional jointing ATLAS Gips Stoner does not require the use of tape, one must use one of three available tapes (tuff tape, paper tape or interfacing tape) when jointing the boards mounted with M-System Technology.
Owing to the reinforced joints (with tapes and jointing mortar), the new lowered ceiling plane acts like a structural plate. It improves the resistance of the joints and makes it much more difficult for scratches or cracks to occur.
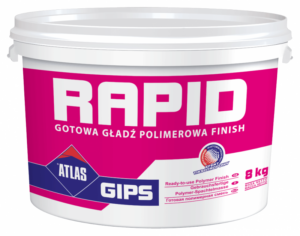
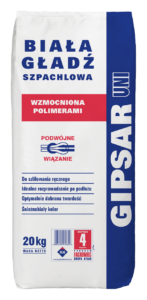
When it comes to selecting the finishing coat, here we have even greater choice. We can use either a finishing coat in a bag (to be mixed with water) or a ready-made finishing coat (which only needs to be stirred before the application). ATLAS Gips Rapid represents a ready-made product, whereas Gipsar Uni or Plus Gipsar can be chosen when one prefers a finishing coat in a bag.
Summary
ATLAS M-System provides easy and quick technology for demanding projects. What is more, one can carry out such projects individually.
Atlas offer:
|
|
Ready-to-use polymer finishing coat ATLAS Gips Rapid
|
|
|
White gypsum finishing coat Gipsar UNI
|
Original text: Mariusz Jurkiewicz, ATLAS Group
English text: Piotr Marciniak, ATLAS Group