News
How to renovate an insulated façade? Special case
Building materials have certain lifespan. It is often the case that they require some repair or replacement over time. Particularly vulnerable to damage and wear are materials used for façade top finishes as they are constantly and directly exposed to negative weather conditions.
ORDER: restoration of the façade insulated with polystyrene about 12 years ago. Two-storey building, thin-coat render probably of mineral type.
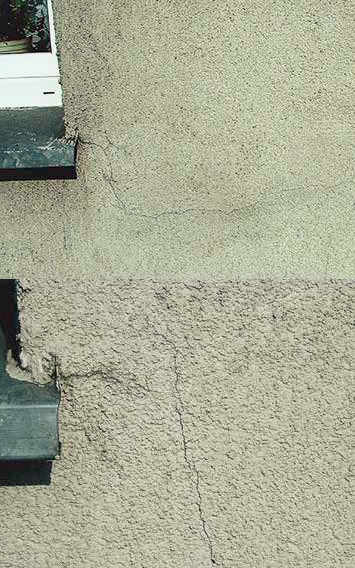
PROBLEM: after careful examination it turned out that two façades (western and southern) are cracked. The cracks direction is close to rectilinear, both vertically and horizontally. On the other hand, the problem does not concern two other façades which, despite of dirt and fading, are rather in good technical condition.
RECOMMENDATION: insulation system is a layered system, made of several different materials which are applied consecutively. Each material has different properties and fulfills different technical function in the system. Therefore, the next steps in terms of renovation should be anteceded by an open pit in the area of cracking. The open pit allows us to determine unambiguously the cause of the defect. First of all, it enables to estimate whether the cracking applies only to rendering coat or also to the basecoat.
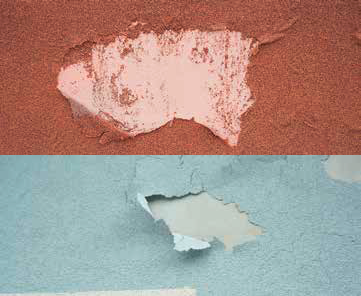
OPEN PIT AND EXAMINATION: the open pit was made close to a balcony slab; it involved removal of the rendering coat in the area of cracking. This led to the conclusion that cracking applied not only to the render, but also to the basecoat (adhesive with reinforcing mesh embedded) and it penetrated both layers. After cutting the basecoat, one could notice that there was white mesh embedded. The mesh was fragile and brittle. Neither loosening of render nor biological contamination was found. The thickness of the applied polystyrene was 5 cm.
ASSESSMENT OF CAUSES: based on the inspection one could determine that cracks generally reflected the arrangement of EPS edges. The use of white polypropylene mesh also contributed to the cracking. The mesh of this type is not resistant enough to alkali contained in the cement adhesive (high pH level). Alkali caused partial dissolving of mesh and damage to the braid. As the destruction of mesh was significant, it could no longer strengthen the basecoat. The most possible cause of cracks is deformation of façade layers caused by cyclical heating and cooling of the façade surface.
REPAIR TECHNOLOGY
There may be two different approaches in the presented case:
1. REPAIR OF CRACKS AND APPLICATION OF NEW RENDERING COAT
If one does not observe the loosening of insulation system from the substrate during visual inspection, then the recommended repair method consists in two applications: first – the basecoat upon the existing substrate and second – thin-coat render. This process has several stages:
- The first step is to clean the façade with washers with adjustable water pressure. By using different types of lances and nozzles (we recommended flattened ones), one can remove surface contamination. Depending on the needs, one can also use detergents or specialist cleaning and degreasing agents. Cleaning can be done with cold or hot water (of approx. 90°C).
- Once the surface is dry, one should remove any peeling pieces of render or adhesive. Next, the entire surface must be primed with ATLAS Uni-Grunt (Aval KT 17) emulsion.
- After approx. 2 hours, when the emulsion dries, one applies ATLAS Stopter K-20/Aval KT 85 adhesive upon the surface. The reinforcing mesh (composed of fiberglass and acrylic coating protecting the fiberglass core from alkali) must be embedded in the coat of adhesive.
- The installation should be carried according to the technique of insulation works; from the top of the wall to the bottom with keeping required overlaps. It is important so that the overlapping does not meet with the cracks visible on the façade.
- The next step is to apply a priming mass beneath thin-coat render.
2. EXECUTION OF SO-CALLED INSULATION UPON INSULATION
Due to the fact that the thermal insulation with only 5 cm thick polystyrene boards was applied, one can consider extra insulating of the existing insulation. This is carried out by fixing new insulation layer. It can be easily assumed that the existing insulation does not meet current requirements for thermal insulation of exterior walls. In the coming years (until 2020) further increase of recommendations regarding minimum U-value (heat transfer coefficient for exterior building partitions) is planned. If investor opts for this solution, it is necessary to do the calculation and to estimate the required thickness of the thermal insulation. Moreover, one needs to use a complete system which allows application of another layer of polystyrene (system ATLAS Renoter in Atlas offer).
|
According to Law – Durability of Insulation Systems European Technical Assessments confirm that the durability of thermal insulation system lasts for at least 25 years, providing that the used elements are part of the system and the works are done in accordance to requirements. On the other hand, ETAG 004, or European Technical Approval Guidelines requires, in order to preserve all the properties of the insulation system, regular maintenance of the finishing coat. |
The method of fixing of the existing insulation layer is also very important. Fixing the boards with patches of adhesive only unequivocally disqualifies such insulation – the existing insulation must be dismantled.
Implementation of the new thermal insulation upon already existing one is possible only if the examination provides us with satisfactory results – good bonding to the substrate. The method of substrate preparation is the same as in the already aforementioned case.
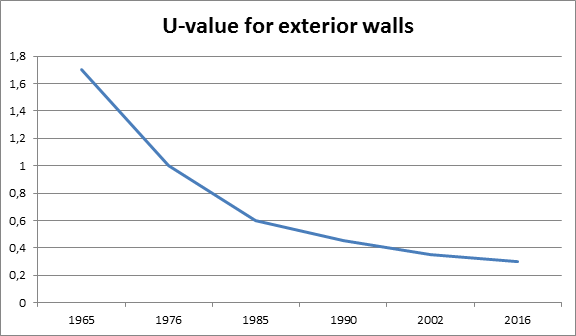
Chart 1. How building regulations concerning thermal insulation have tightened up in UK over the last 50 years.
After the substrate preparation, one can apply the new thermal insulation. The most important assumption is that the structural part of wall should be treated as the substrate rather than the outer layer of the existing insulation. Therefore, it is crucial to ensure appropriate mechanical fixing which is mandatory in case of insulating the existing thermal insulation. It must provide sufficient anchorage in the wall. The length of fixings should therefore be the sum of:
- total thickness of the old and new insulation system,
- depth of fixing for a given substrate type (wall) recommended by the manufacturer.
We recommend using fixings with steel pins, which are protected against corrosion and fastened through both polystyrene layers. The application of the reinforcing layer, priming mass for render and thin-coat render does not differ from standard
application performed during the thermal insulation of buildings.
|
Original text: Sebastian Czernik, ATLAS Group
English text: Piotr Marciniak, ATLAS Group